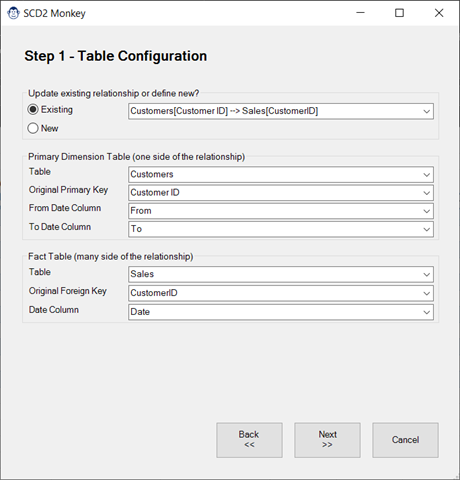
Monkey Tools

Smart File Function

Article Overview

You’ve built an amazing query to connect to a file and clean it up, only to find that when you share the solution the path to the file changes.  In simple cases it is just a local file path that changes – and the worst cases it switches between a local file path and SharePoint (or vice versa.)  Regardless, it involves editing the query and sometimes rebuilding it from scratch.

The SmartFile function provides the answer to that problem, as you can pass it either a local path on your hard drive or the web path and it will “smart switch” to use the correct Power Query connector to read from the local or SharePoint folder.  This function is intended for use in combination with a dynamic filepath setup, as provided by our Parameter Table & Function monkey.

About the SmartFile Function

What this Monkey does

This feature inserts the SmartFile function into the workbook, allowing you to solve a couple of issues…

The ultimate goal is to provide a robust connector that can connect you to a file which is smart enough to determine and deal with changes between local and web hosted files, allowing you to focus on the data cleanup.

In the case of Excel workbooks and Access databases, this connector will also provide an empty blank table in the case the file is not found, which may help prevent breakage in downstream steps of your query.

Implementing the fnSmartFile Function

Adding this function to your workbook is very easy.

  • Go to the Monkey Tools ribbon tab
  • Click Query Monkeys -> SmartFile Function

A new query called fnSmartFile will be injected directly into your workbook and show up in the Queries & Connections pane, ready for your use.

The fnSmartFile query showing up in the Queries and Connections pane

Using the fnSmartFile Function

Before invoking the fnSmartFile query, we recommend that you add a Parameter Table and the fnGetParameter function to your workbook. This will allow you to create dynamic file paths with ease, and allow you to take advantage of the power that the fnSmartFile function has to offer.

Step 1: Generate Dynamic File Paths

If you don’t already have a Parameter Function and Table in your workbook, you can create them quickly via the following steps:

  • Save the Workbook
  • Go to Query Monkeys -> Parameter Table & Function
  • Build a formula to dynamically return the path to your data file relative to where your workbook lives
Launching the Parameter Table and Function monkey from the Query Monkeys menu
In the image below, we took the default output of the Parameter Table created by Monkey Tools and made the following modifications:

Changes made:

  • C10:  Build Better.xlsx
  • C9:  =C8 & C10
  • B11:  CSV
  • C11:  =C8 & “CSVs\Jan 2008.csv”)
Updates to our Parameter table
Our intention here is that we will be connecting to the Build Better.xlsx file in the same folder as our solution (Demos), as well as the Jan 2008.csv file which is stored in the CSVs subfolder of the Demos folder.

Step 2 (Option 1): Invoke the Functions on an Excel file

In order to make it easier to debug your work in future, we recommend taking the following steps:
  • Go to Get Data -> From Other Sources -> Blank Query
  • In the formula bar, enter the following formula below:
				
					=fnGetParameter( "<parameter name>" )
				
			
  • Verify that the full file path is displayed in the preview window. (If not, check that the spelling and casing of the terms between your quotes is exactly the same as what is shown in the first column of your parameter table.)
Verifying that fnGetParameter is returning a file path
  • Click the fx button to the left of the formula bar to create a new step
  • In the formula bar, replace Source with =fnSmartFile( Source ) as shown here:
The results of invoking the fnSmartFile function, showing an table of Excel values

At this point, you are looking at the table that represents all of the values you can import from the Excel file.  From here you could:

  • Drill in to a specific table, or
  • Create a reference to this query, allowing you to drill into multiple tables, or
  • Use the Expand function at the top of the Data column to expand (and append) all the tables in the workbook, or
  • Anything else you need to do with the file.

And you can do all of this with the assurance that – so long as your data file stays in the same location relative to your solution – that you will be able to refresh it in future.

Step 2 (Option 2): Invoke the Functions on a CSV file

The steps to work with CSV, TXT, PDF, XML, JSON or HTML files is the same as for Excel files as above. The only major difference is what happens when you call the fnSmartFile function.  Instead of seeing a table, you’ll see the image representing the file:
The result of importing a CSV file with fnSmartFile shows an icon, not data

At this point, you have two options:

  1. Double-click the file icon and let Power Query interpret it as it believes should be done.
  2. Right-click the file icon and choose which connector should be used to import the file.

In our experience, Power Query does a beautiful job when just double-clicking the file. It will the interpret the data specific to the file using its built-in logic.

Step 3: Releasing Your Solution

We are now ready to release your solution.

When working as consultants, we generally zip up all files in the folder, sent it to our client and ask them to extract them all.  When working inside the corporate network it may just be someone accessing the file from a shared drive.  In either case, this solution will just work.

The only caveat is when someone stores the solution in a SharePoint sync folder, as Office replaces local file paths with the SharePoint URL, which requires a different connector.  And that is the major point of this function.  Here’s what to expect when the file path switches from a local to a SharePoint URL:


Share:

Facebook
Twitter
LinkedIn

Related Posts

SCD2 Monkey

Coming Soon! Sorry, but this article isn’t quite ready yet. We promise that we’re working on it! In the mean time – until we get

Calendar Monkey

Coming Soon! Sorry, but this article isn’t quite ready yet. We promise that we’re working on it! In the mean time – until we get

Click Query Monkeys -> Measure Table Monkey to add measure table

Add Measure Table

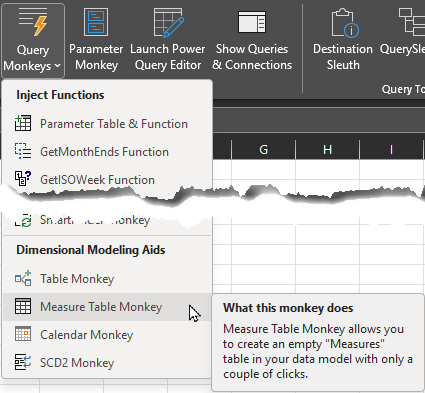
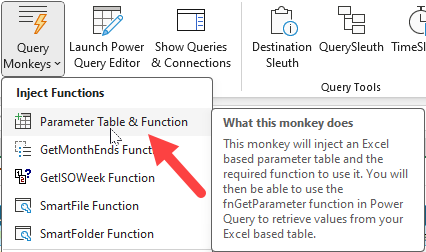
Article Overview Many modelers like to store their measures on a single “Measures” table in the data model.  If you’re one of them, you may

Table Monkey

Coming Soon! Sorry, but this article isn’t quite ready yet. We promise that we’re working on it! In the mean time – until we get

SmartFolder Monkey

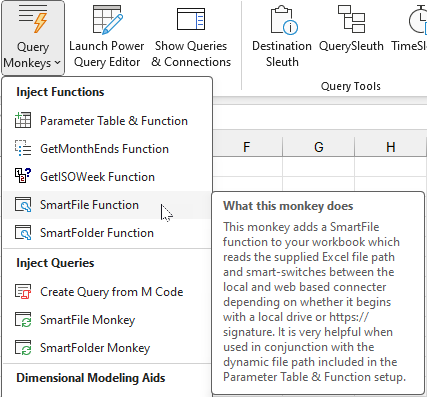
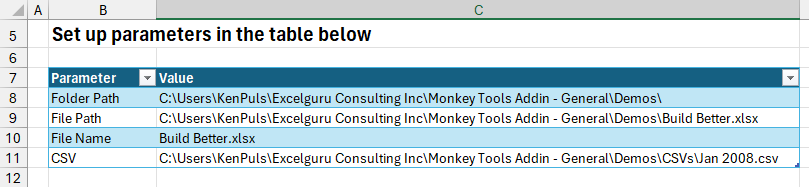
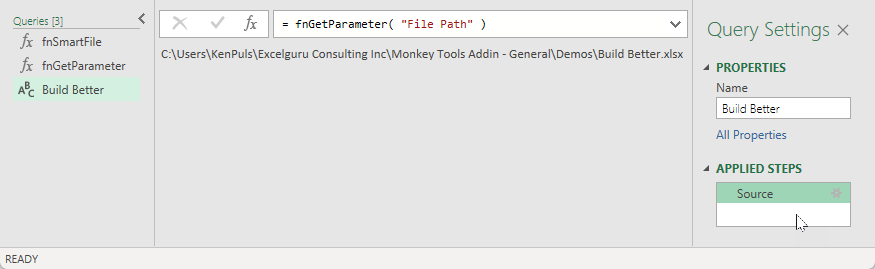
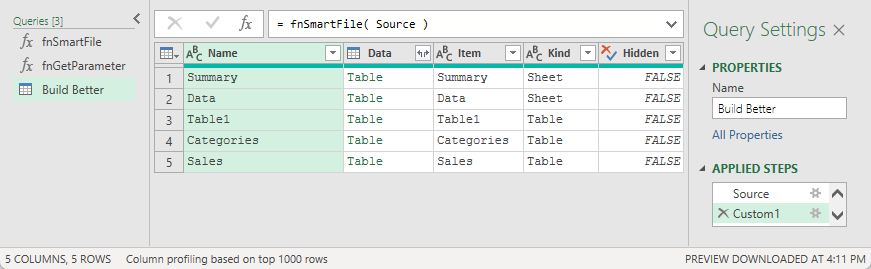
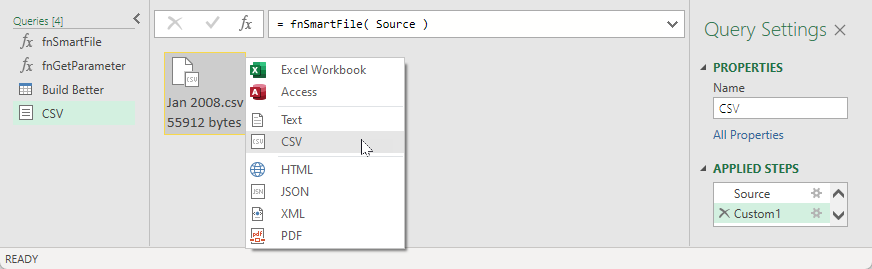
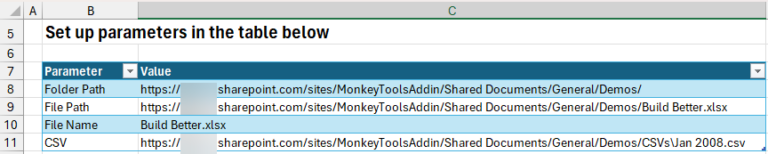
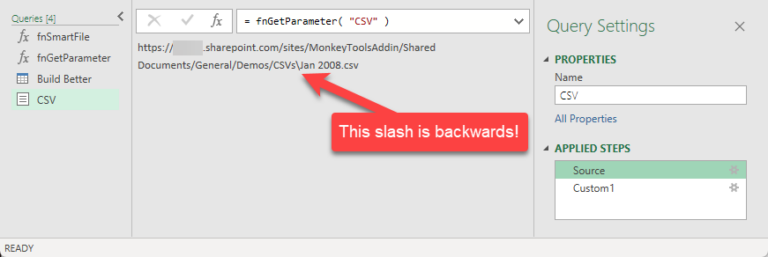
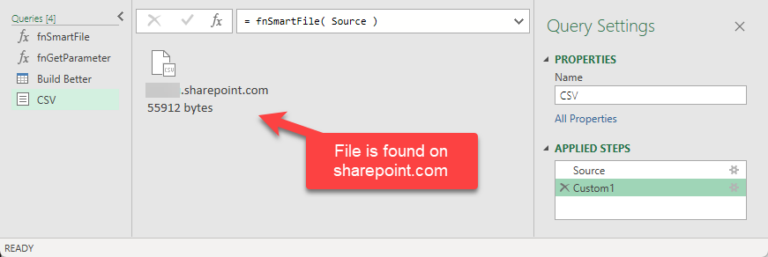
Article Overview One of our favourite tricks is to create a “From Folder” solution which avoids hard-coding a file path, instead pulling it dynamically via