
Excel Feature Improvements
Article Overview Monkey Tools offers several Excel feature improvements to build a better user experience. While the vast majority of these features are custom-built to


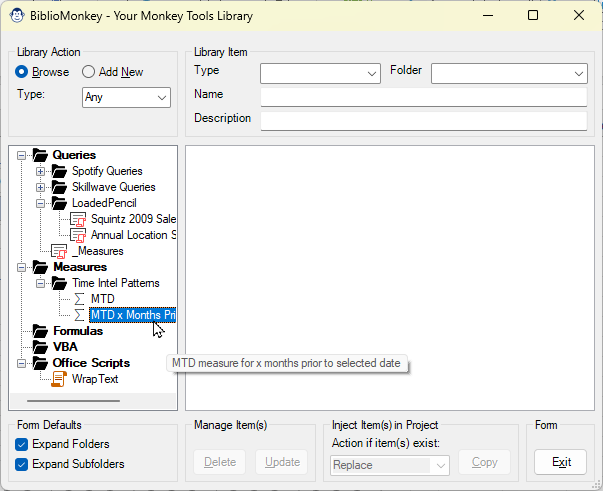

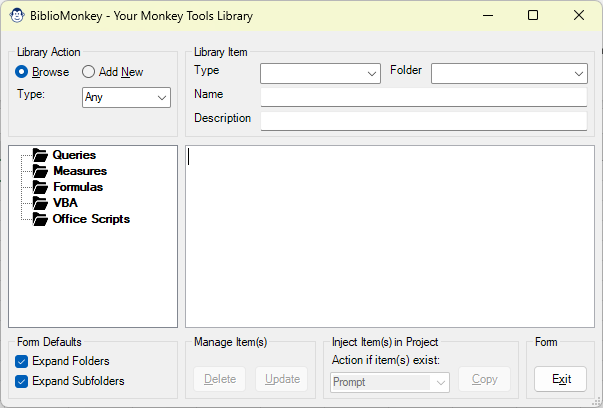
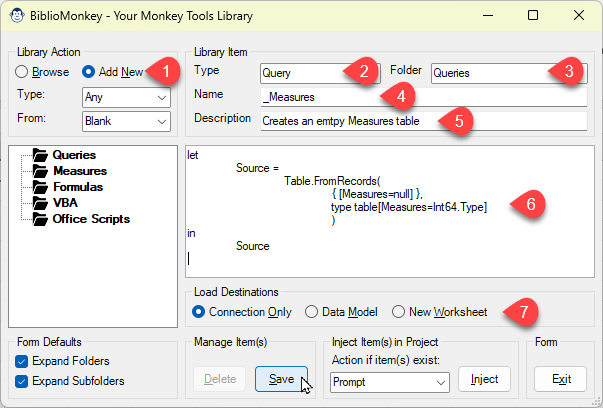
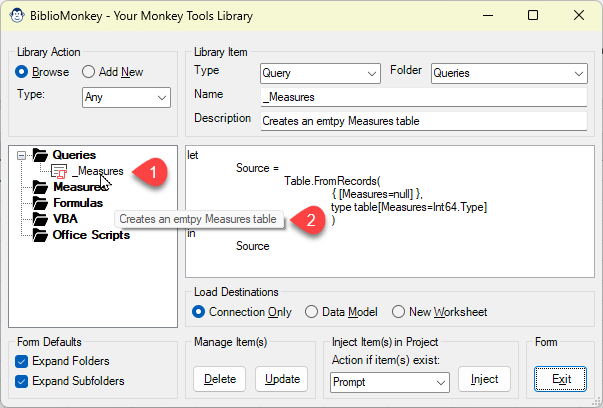


Article Overview Monkey Tools offers several Excel feature improvements to build a better user experience. While the vast majority of these features are custom-built to

Introduction This End User License Agreement (“EULA”) is a legal agreement between you and Excelguru Consulting Inc. for the Monkey Tools software product, including any

Article Overview The Connection Monkey is your one stop shop in order to connect to the various Excel workbooks or Power BI models that Monkey
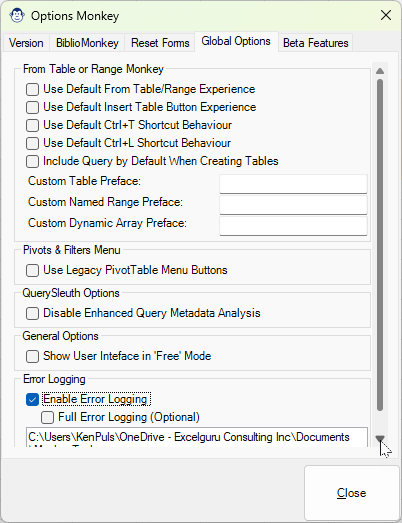
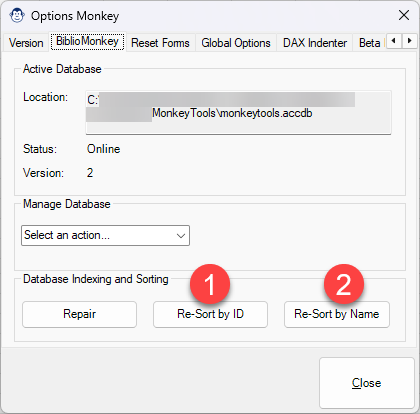
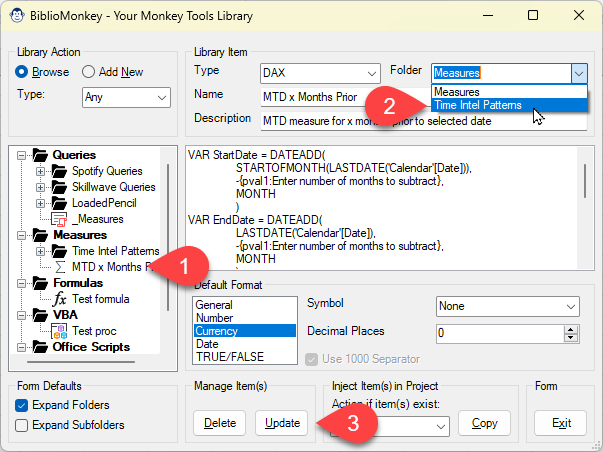
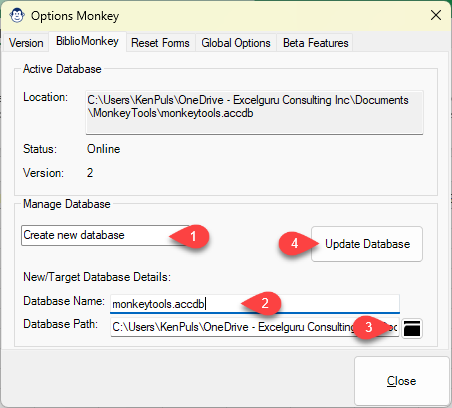
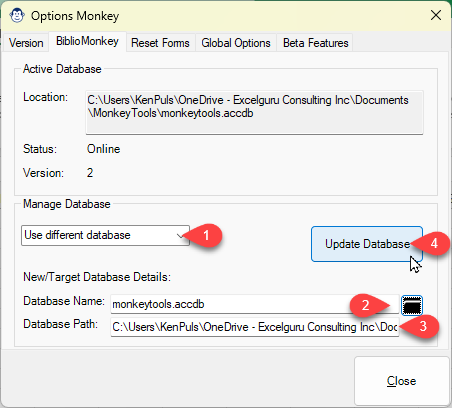
Article Overview What is an application with Options? Monkey Tools is no difference, and we have a specific Options Monkey to help you control them
Coming Soon! Sorry, but this article isn’t quite ready yet. We promise that we’re working on it! In the mean time, we did feature this